Have you ever had such an experience? On the fairway, there was an urgent need for distance measurement. I was frantically rummaging through the side pockets and the main compartment of my golf bag, but the distance meter was like playing hide-and-seek with me, and I couldn't find it no matter how hard I tried. After much difficulty in finding and using it, I casually put it down. When I needed it in the next hole, I found it had "disappeared". Or hang it with a lanyard, only to find that the lanyard gets entangled in the stand, making it troublesome and time-consuming to access. What is even more worrying is that the rangefinder was bumping around in the bag, fearing that this precision instrument would be damaged. Hang it around your neck and it will sway back and forth, affecting your swing.
Don't worry. A stable, convenient and safe ball bag installation solution can solve these problems, allowing you to access or return the rangefinder within 3 seconds. From now on, say goodbye to being flustered and focus on every hit! This article will guide you step by step on how to choose and install the most suitable rangefinder fixing solution for your golf bag and habits.

What Are The Methods Of Attaching Rangefinder To Golf Bag?
First at all, let's abandon those ineffective solutions, such as simple lanyards, which are prone to loss, entanglement and swaying. Throwing it casually into a bag is not only hard to find but also prone to bumps and knocks - everyone knows these are not practical, so let's skip them and look at effective methods.
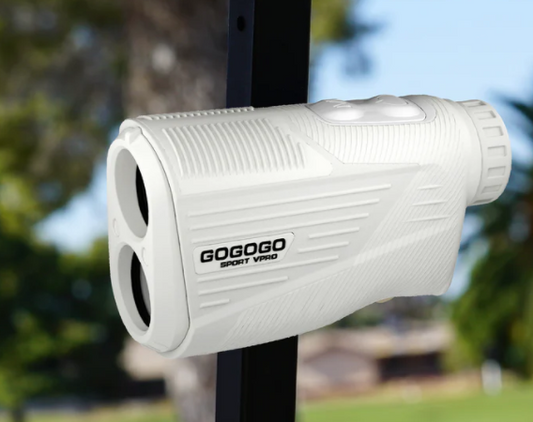
Option 1: Specialized Clips (the most common and flexible)
This solution can address the pain points such as quick retrieval and placement, stability and loss prevention, flexible positioning, and avoidance of entanglement.
Select the type of clamp
Common types include spring clamps, screw tightening clamps, and magnetic clamps. The spring clamp is easy to install and is suitable for clamping on thinner areas such as the edge of a ball bag. The screw tightening clamp has better stability and is suitable for clamping on parts such as pipes. The magnetic clamp is easy to install, but its suction force is limited and it is suitable for lighter rangefinders.
Identify the installation location
Choose a position that is easy to access and does not affect walking, pushing the cart, or placing bags. For example, the upper edge of the side bag, the outside of the bracket tube, and near the handle of the cart are all good choices.

Install the clamp body
- Spring clamp: Directly pry open the clamp opening and clamp it onto the thick edge of the selected ball bag or the pipe material to ensure that there is no sliding during clamping.
- Screw tightening clamp: Wrap the clamp around the ball wrapping pipe or the edge, and tighten it with the included screws and tools (often requiring an Allen wrench) to ensure it is secure.
- Magnetic clamp: (If any) Firmly attach the metal sheet with adhesive backing to the selected position of the ball bag, and the clamp body is adsorbed by magnetic force.
Install the rangefinder
Insert the protective cover or the body of the rangefinder into the slot of the clamp. It is ready when you hear a "click" sound or feel it is firmly locked.
Testing and fine-tuning
Shake the ball bag vigorously to test its stability. Try to take it out and place it quickly several times to ensure smoothness. Adjust the Angle of the clip according to the viewing Angle.
Key points to note
1. The buckle position should avoid blocking the openings of other pockets.
2. Make sure the clips do not come loose accidentally, especially the spring clips. Choose high-quality ones.
3. When fixing the screws, they should be tight enough but not damage the fabric of the ball bag.
4. Make sure that the clamp is compatible with your rangefinder model and protective case.
Option 2: Specialized Bracket/Base (More stable)
This solution can achieve ultimate stability, an integrated appearance, better protection (some with hard shells), and is equally convenient to take out and put in.
Select the type of bracket
1. Screw-fixed type: Usually equipped with a multi-hole base, holes need to be drilled at the selected position of the ball bag (often the side bag or a specially designed area) or it should be stuck with self-adhesive.
2. Strap/rope binding type: Fix the hard base to the ball-wrapped pipe or specific structure with binding straps or ropes.
3. Integrated type (high-end ball bags) : Some ball bags come with reserved holes or slots.
Install the bracket base
1. Screw fixation: Mark the punching points on the sturdy parts of the ball bag (such as the thickened leather areas) (be extremely careful!) Fix it with the matching screws and nuts, or stick it with strong adhesive tape (make sure the surface is clean and dry).
2. Binding type: Wrap the binding strap around the ball-wrapped pipe material, pass it through the base buckle, and tighten and fix it.
3. Integrated type: Directly align with the reserved position for insertion or clamping.
Install the rangefinder/protective case
Insert or screw the rangefinder (or the dedicated hard shell protective case that comes with it) into the interface on the bracket.
Testing and adjustment
Focus on testing stability and smoothness in taking and placing. Adjust the Angle of the bracket to obtain the best field of view.

Disadvantage
- Risk of drilling: Extreme caution is required for screw fixation. Ensure that the position is reasonable and will not damage the structure of the ball bag or its waterproof performance. It is not recommended for beginners to drill holes unless necessary.
- Compatibility: The bracket is usually only compatible with specific brands and models of rangefinders and their dedicated protective cases. Please confirm before purchasing.
- Volume and weight: The bracket is usually larger and heavier than the buckle, and the impact on the balance of the ball bag should be taken into consideration.
- Location limitation: The installation position is relatively fixed and not as flexible as that of a clamp.
How To Choose The Right Solution For Attaching Rangefinder?
Ball bag type
- Bracket bag: It is preferred to be clamped on the outside, top or upper edge of the side bag of the bracket tube. Pay attention to the position of the clamp to avoid interfering with the opening and closing of the b0racket. The bundled bracket is also a good choice.
- Stand-up bag: Clipped onto the upper edge of the side bag or the support structure near the handle. Avoid affecting standing stability.
- Trolley/ball cart bag: Consider a side bag that can be clipped near the trolley handle or facing you for easy access while sitting on the cart. Be careful of the length to avoid bumping your legs.
Rangefinder model
Confirm whether the clips and brackets are compatible with your model and its protective cover. Original factory parts are usually the best match.
Your usage habits
- Frequent taking and putting? Select clips (especially spring and magnetic ones).
- More emphasis on anti-loss and anti-collision? Choose high-quality screw clips or brackets.
- Don't want to hit the ball bag? Choose a snap-on or bundled bracket.
The golden rule of installation location
1. Easy to reach and place: Within easy reach when your hand hangs naturally or when pushing a cart.
2. Unobstructed field of view: After installation, there are no obstructions in front of the rangefinder lens.
3. Secure support points: Select thick and sturdy parts of the ball bag (such as leather pads, thickened seams, and pipes).
4. Avoid interference: Do not block the opening of the pocket, do not affect the strap or handle, and do not interfere with the placement and opening and closing of the ball bag (bracket bag).
5. Balance counterweight: Avoid installing it on one side to prevent the ball bag from tilting (especially for heavier brackets).
6. Reduce bumps: Avoid installing in positions that are prone to being hit by golf clubs, other equipment or while walking.

How To Check After Attaching a Golf Rangefinder?
1. Stability test
Shake the ball bag vigorously to simulate the jolting of walking or pushing a cart. The rangefinder should remain motionless or only shake slightly and reasonably.
2. Smoothness test for taking and placing
Simulate a real combat scenario, quickly take the rangefinder with one hand, observe the target, and then quickly put it back with one hand. The process should be smooth and unobstructed.
3. Perspective adjustment
Make sure the installation Angle of the rangefinder is convenient for observing the target and avoid the need to twist your wrist significantly. Some clips and brackets have adjustable angles.
4. Safety inspection
- Are the clamping screws tightened without any looseness?
- Is the force of the spring clamp sufficient? Will it accidentally pop away due to vibration?
- Is the drilling or bonding point of the (bracket) firm? Could the edge possibly wear out the rangefinder or the ball bag?
- Is the suction force of the magnetic clamp sufficient? Stay away from strong magnetic field interference sources.
5. Long-term maintenance tips
Regularly check whether the fixed points are loose, whether the clamping springs are fatigued, and clean the contact surfaces.
Conclusion
A correct installation plan not only addresses the issue of "where to put it", but also enhances efficiency, reduces anxiety, protects equipment, and enables you to focus on playing the game.
Based on your ball bag and rangefinder, choose and install the most suitable solution for you right away! Wait for the next round: When the target appears, you can reach out and get the rangefinder. After accurately measuring the distance, calmly put it back and then swing the club with concentration. This is exactly the experience that smooth golf should offer!

![[2025] The Ultimate Guide to Pinseeker Rangefinders for Golfers](http://gogogosport.com/cdn/shop/articles/gogogo_sport_vpro_pinseeker_rangefinder.png?v=1757993796&width=533)